Strawberry Cheesecake Dump Cake
Strawberry Cheesecake Dump Cake: The Easiest Dessert You’ll Ever Make
Introduction
Craving a rich, creamy, and fruity dessert but don’t want to spend hours in the kitchen? This Strawberry Cheesecake Dump Cake is the perfect solution! With just a few simple ingredients, you can create a decadent, crowd-pleasing dessert that tastes like a combination of cheesecake, cobbler, and cake—all in one bite!
A dump cake is one of the easiest desserts to make because you literally “dump” all the ingredients into a baking dish, and the magic happens in the oven. The strawberry pie filling provides a sweet and tangy fruit base, the cream cheese adds a luscious richness, and the yellow cake mix creates a buttery, golden topping. It’s a no-fuss dessert that’s perfect for potlucks, family gatherings, or just a cozy night in.
Why You’ll Love This Recipe
✔ No mixing required – Just dump, layer, and bake!
✔ Only a few ingredients – Minimal effort, maximum flavor.
✔ Perfect for any occasion – From BBQs to holiday dinners.
✔ Tastes like cheesecake and cobbler combined – A truly indulgent treat!
✔ Customizable – Swap out the fruit filling or add extras for a unique twist.
Ingredients You’ll Need
Main Ingredients
- 1 can (21 oz) strawberry pie filling – Provides the fruity base.
- 1 box (15.25 oz) yellow cake mix – Creates the golden, crumbly topping.
- 1 package (8 oz) cream cheese – Adds a rich, creamy layer.
- ½ cup sugar – Sweetens the cream cheese layer.
- ½ cup (1 stick) melted butter – Helps create the perfect buttery topping.
Optional Additions
- 1 tsp vanilla extract – Adds a hint of extra flavor to the cream cheese.
- ½ cup chopped pecans or walnuts – For a crunchy topping.
- 1 cup fresh strawberries – For extra freshness and garnish.
Step-by-Step Instructions
1. Preheat & Prepare
- Preheat your oven to 350°F (175°C).
- Grease a 9×13-inch baking dish with butter or non-stick spray.
2. Layer the Ingredients
- Spread the strawberry pie filling evenly across the bottom of the dish.
- In a separate bowl, mix the softened cream cheese with sugar (and vanilla, if using) until smooth.
- Dollop the cream cheese mixture over the strawberry filling, gently spreading it out.
3. Add the Cake Mix & Butter
- Sprinkle the yellow cake mix evenly over the layers—do not mix!
- Drizzle melted butter evenly over the cake mix, covering as much as possible.
4. Bake the Cake
- Place in the oven and bake for 40-45 minutes, or until the top is golden brown and slightly crisp.
5. Cool & Serve
- Let the cake cool for 10-15 minutes before serving.
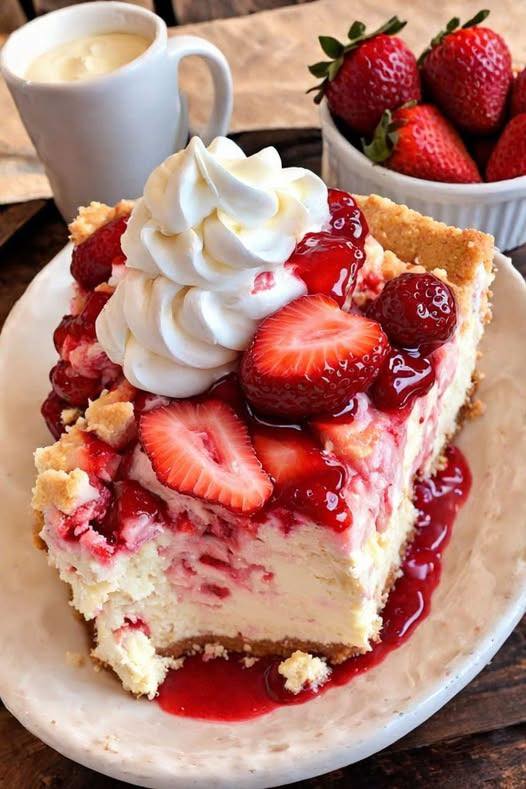
- Optional: Top with fresh strawberries, whipped cream, or a scoop of vanilla ice cream.
Tips for the Best Dump Cake
Make sure to distribute the butter evenly – This helps the cake bake properly and creates a deliciously crisp topping.
Don’t mix the layers – The magic of a dump cake happens when the ingredients bake in separate layers.
Use cold cream cheese for firmer texture – If you prefer chunks of cream cheese instead of a smooth layer, cut it into cubes before layering.
Let it cool slightly before serving – This allows the flavors to set and enhances the texture.
Variations to Try
Strawberry Lemon Dump Cake – Add 1 tbsp lemon zest to the strawberry filling for a refreshing citrus twist.
Chocolate Strawberry Dump Cake – Use chocolate cake mix instead of yellow cake mix for a decadent, chocolatey version.
Strawberry Coconut Dump Cake – Sprinkle ½ cup shredded coconut over the cake mix before baking.
Mixed Berry Dump Cake – Replace half the strawberry filling with blueberry or apple pie filling for a fruitier combo.
How to Serve Strawberry Cheesecake Dump Cake
This deliciously gooey dessert pairs well with:
A scoop of vanilla ice cream – The perfect contrast of warm cake and cold ice cream.
Whipped cream and fresh berries – A light and refreshing topping.
☕ A cup of coffee or tea – A cozy treat for any time of day.
Drizzle of caramel or chocolate sauce – Extra indulgence!
Storage & Reheating Instructions
- Refrigerator: Store leftovers in an airtight container for up to 4 days.
- Freezer: Wrap tightly and freeze for up to 3 months.
- To reheat: Warm individual servings in the microwave for 20-30 seconds, or bake at 300°F (150°C) for 10 minutes to re-crisp the topping.